


Hokkaido Powder Snow Travel Guide: Sapporo Snow Festival, Winter Routes & Smart eSIM Tips
If you dream of waist-deep powder turns in the morning and wandering through glowing ice sculptures at night, this Hokkaido powder snow travel guide is exactly what you need. Hokkaido in winter is a playground for powder snow chasers, but it’s also a logistical puzzle: extreme cold, shifting train schedules, language barriers, and the constant need for navigation and weather updates. In this guide, I’ll walk you through how to combine the Sapporo Snow Festival with snowboarding routes, plus the micro tips that actually matter when you’re trying to stay connected in -15°C. We’ll also break down how a Japan travel eSIM for tourists fits into the picture, and what to watch out for when your phone is your lifeline in the snow.
Before we dive into routes and resorts, it’s worth getting your connectivity plan sorted. Many travelers only discover how much they rely on data when they’re standing outside Sapporo Station, trying to find their hotel in a blizzard. That’s why I always recommend reading a general about eSIM overview before your trip, so you understand how digital SIMs work and what they can (and can’t) do for you in Japan. With that foundation, we’ll layer in Hokkaido-specific advice, from avoiding frozen batteries to choosing routes that maximize both powder and festival time.
Why Hokkaido Powder Is Special (and What That Means for Your Itinerary)
Hokkaido’s snow has almost mythical status among skiers and snowboarders. The island sits in the path of cold Siberian air masses that cross the Sea of Japan, pick up moisture, and then dump it as incredibly dry, light snow when they hit Hokkaido’s mountains. Resorts like Niseko, Furano, and Kiroro regularly see 10–15 meters of snowfall in a season, with storm cycles that can bring 30–50 cm overnight. This matters for your itinerary because it changes how you plan your days: instead of chasing bluebird skies, you’re often chasing storm patterns and tree runs, and you’ll want flexible transport and connectivity to adapt on the fly.
In my experience, travelers who try to cram “all of Hokkaido” into a week end up spending too much time on trains and not enough time actually riding powder. A better strategy is to pick one main region—Niseko area, Central Hokkaido (Furano/Asahikawa), or Sapporo plus nearby resorts—and then weave the Sapporo Snow Festival into that base plan. For example, if you’re focused on Niseko, you might fly into New Chitose, head straight to Niseko for five days, then return to Sapporo for two festival nights before flying out. If you’re chasing colder, drier snow, you might base in Asahikawa, ride Kamui Ski Links and Asahidake, then take a one-night detour to Sapporo for the festival.
The other reason Hokkaido’s powder matters for planning is avalanche control and off-piste culture. Resorts like Niseko United operate gate systems for sidecountry access, and these can open or close based on wind, snowfall, and visibility. To get the most out of your trip, you’ll want reliable mobile data in Japan for tourists so you can check live lift status, gate openings, and avalanche bulletins. I’ve lost count of how many times a last-minute gate opening notification changed my plan from “cruisy groomer day” to “best powder day of the trip,” but that only works if you’re actually online.
Finally, Hokkaido’s winter climate is serious. Temperatures in January and early February can sit between -5°C and -15°C in Sapporo, and drop below -20°C in inland areas like Asahikawa or Asahidake. This affects not just what you wear, but how you use your phone, which apps you rely on, and how you manage battery life. Later in this guide, we’ll get into specific winter travel tech tips, but for now just know that extreme cold is not an abstract concept here—it will shape how you move, ride, and stay connected every day.
Planning Your Sapporo Snow Festival Itinerary (and How to Combine It with Riding)
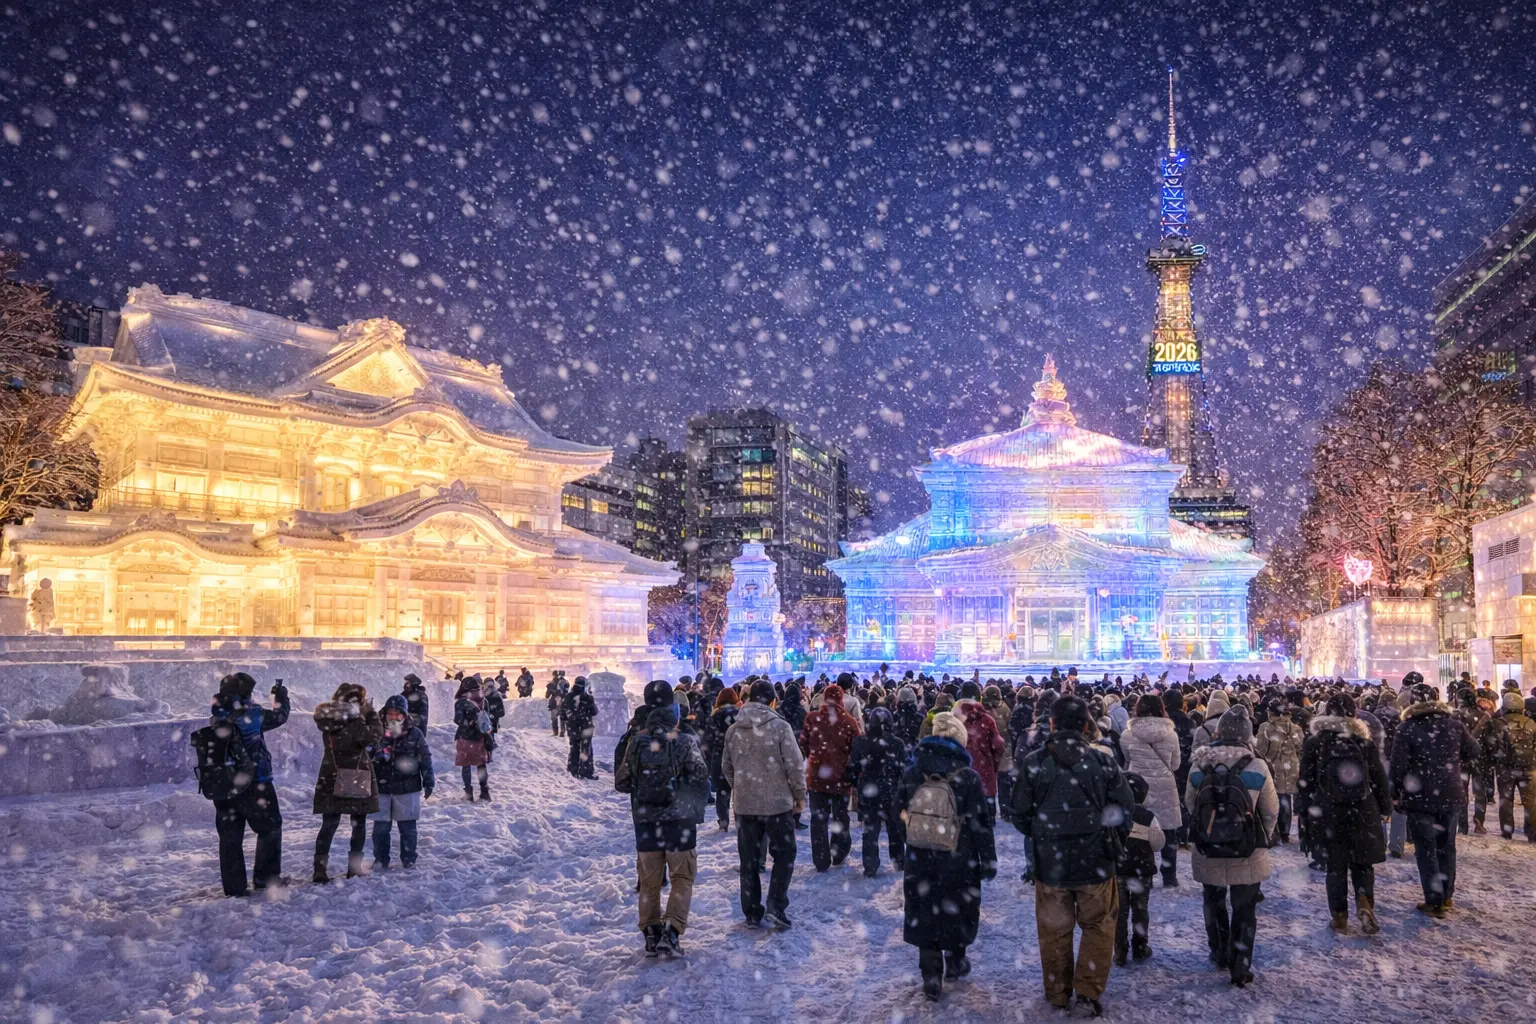
The Sapporo Snow Festival (Sapporo Yuki Matsuri) usually runs for about a week in early February, with the main sites at Odori Park, Susukino, and Tsudome. The core dates shift slightly each year, but you can generally expect it around the first full week of February. If you’re building a sapporo snow festival itinerary around powder riding, the key is to decide whether the festival is your “base” or your “bonus.” In other words, are you coming primarily for the festival with a side of snowboarding, or is it a powder trip with a couple of festival nights tagged on?
For festival-first travelers, a common plan is three nights in Sapporo, with one or two day trips to nearby resorts like Teine or Kokusai. You might arrive at New Chitose Airport, take the JR Rapid Airport train (about 40 minutes, around ¥1,150) into Sapporo, drop your bags at a hotel near Odori or Susukino, and spend your first evening walking the Odori Park snow sculptures. The next day, you can ride Teine, which is about an hour by bus from central Sapporo, then return in time to explore the Susukino ice sculptures at night. With solid data on your phone, using Google Maps and the local bus company sites, this kind of day trip is surprisingly straightforward even if you don’t speak Japanese.
If you’re powder-first, you might flip things. For example, fly into New Chitose, head straight to Niseko for five or six days, then return to Sapporo for the last two nights of the festival. This works particularly well if you’re already used to using regional eSIMs in other countries—if you’ve ever juggled a France eSIM for a ski trip in the Alps, the Hokkaido pattern will feel familiar. The key difference in Hokkaido is that festival crowds push hotel prices up in central Sapporo, so book early if you want walkable access to Odori Park. I’ve seen mid-range hotels that are usually ¥8,000 per night jump to ¥15,000–¥18,000 during peak festival nights.
One micro tip many travelers miss: the festival sites are spread out enough that you’ll likely use public transport between them, especially in deep cold. Odori Park is central, but Tsudome (the family-friendly site with snow slides and tubing) is a subway ride plus a shuttle away. Having a stable data connection makes it much easier to follow the temporary shuttle bus routes, check operating hours, and coordinate with friends if you get separated in the crowds. It’s not uncommon to lose sight of your group in the festival chaos, and being able to drop a live location pin in a chat app can save you a lot of frustration.
Best Hokkaido Powder Snowboarding Routes That Pair Well with the Festival
When people talk about “hokkaido powder snow snowboarding,” they usually mean one of three main regions: Niseko and its neighboring resorts, Central Hokkaido (Furano, Asahikawa, Asahidake), or the Sapporo-area hills like Teine, Kokusai, and Kiroro. Each of these can be combined with the Sapporo Snow Festival, but the logistics and vibe are slightly different. Choosing the right route is less about which resort is “best” and more about how much transit time you’re comfortable with, and how flexible you want your powder chasing to be.
A classic route for first-timers is: Sapporo (2 nights for festival) → Niseko (4–5 nights) → New Chitose departure. You can take a direct resort bus from Sapporo to Niseko in about 3 hours, or train plus bus via Otaru. Niseko United (Grand Hirafu, Niseko Village, Annupuri, and Hanazono) offers a huge range of terrain, English-friendly services, and plenty of guiding options if you want to explore sidecountry through the gate system. The trade-off is that Niseko can be crowded and more expensive, especially around Chinese New Year. In those peak weeks, having reliable data to check live lift lines through resort apps or social feeds can help you time your riding to avoid the worst bottlenecks.
If you’re after colder, drier snow and fewer crowds, consider a Central Hokkaido route: Sapporo (1–2 nights) → Asahikawa (3–4 nights) → Furano (2–3 nights) → New Chitose or Sapporo. Asahikawa gives you access to Kamui Ski Links and the legendary backcountry of Asahidake, where you ride off a ropeway into natural terrain with minimal grooming. Furano offers a mix of groomers, tree runs, and lift-accessed sidecountry. This route involves more train and bus connections, so it pays to have your timetables saved and your navigation apps ready. I often preload routes on Google Maps over Wi‑Fi, but I still rely on live data to check delays and platform changes, just like I would when using an Italy eSIM for train hopping around the Dolomites.
For travelers who want a simpler base, a Sapporo-centric route can work wonderfully: stay in Sapporo for 5–7 nights, ride day trips to Teine, Kokusai, and Kiroro, and weave festival nights into the middle of your stay. Teine is about 40–60 minutes from downtown, Kokusai around 60–90 minutes, and Kiroro roughly 90 minutes to 2 hours depending on snow and traffic. This approach means you only book one hotel and you get the full city-plus-mountains experience. The downside is slightly more commuting in ski boots, but if you’re the type who likes a ramen hunt or onsen soak after riding, Sapporo as a hub can be a fantastic choice.
eSIM Basics for Japan: Getting Set Up Before You Hit the Snow
Let’s talk connectivity, because in Hokkaido winter, your phone is more than a social media machine—it’s your map, your weather station, your translation tool, and your backup safety device. Using a japan travel esim for tourists is usually the most straightforward way to get online without dealing with physical SIM cards in a cold airport or paying your home carrier’s painful roaming rates. With an eSIM, you scan a QR code or follow an installation link before you leave home, and your phone downloads a digital SIM profile that activates once you land in Japan and connect to a local network.
Most recent iPhones (XS and newer), Google Pixel models from the Pixel 3 onward, and higher-end Samsung Galaxy phones support eSIM. If you’re unsure, it’s worth checking your device settings or looking up your model on EasyAlo’s compatibility list before you buy. The process of how to use eSIM in Japan during winter is the same as any season: install the profile while you have stable Wi‑Fi at home, keep your physical SIM in as backup if you like, and then switch your data line to the eSIM once you land. The big advantage is that you’re online as soon as you clear immigration, which makes it a lot easier to find the train to Sapporo or message your guesthouse in Niseko if you’re running late.
In my own trips, I’ve found that the best eSIM for Japan travelers usually offers a clear data allowance (for example, 10 GB for 15 days or 20 GB for 30 days) with 4G/LTE speeds on major Japanese networks. You generally don’t need 5G for navigation, messaging, and weather apps, and 4G tends to be more stable in many mountain areas anyway. When comparing plans, pay attention to whether the data is truly local (Japan-only) or part of a regional Asia bundle. For a dedicated Hokkaido powder trip, Japan-only is usually the most cost-effective, whereas a broader Asia plan makes sense if you’re also flying through Singapore or another hub where you might use a Singapore eSIM for a city stopover.
The other question people often ask is whether they need voice calls or a Japanese phone number. For most snow travelers, a data-only eSIM is enough. You can call your accommodation via WhatsApp, Line, or Skype, and most shuttle and tour operators are used to communicating through email or messaging apps. If you think you’ll need to call Japanese numbers frequently—for example, if you’re booking backcountry guides last-minute—you can always pair your data eSIM with a cheap VoIP service that gives you a local number for inbound calls. The key is to decide before you’re standing in the arrivals hall at New Chitose, because trying to figure this out with gloves on and jet lag in your system is nobody’s idea of fun.
How Extreme Cold Affects Your Phone, eSIM, and Mobile Data
Here’s where things get really specific: extreme cold absolutely affects your phone’s performance, and if you’re not prepared, it can mess up your carefully planned day on the mountain. Lithium-ion batteries hate cold. At -10°C or below, it’s common to see your battery percentage drop from 60% to 10% in minutes, or for your phone to shut off entirely even though it still has charge left. This doesn’t damage the eSIM itself—the profile is just data stored in your phone’s secure element—but if your phone dies, your navigation, lift status apps, and messaging all go offline until you can warm it up again.
To stay connected in extreme cold weather travel, you need to treat your phone like another piece of technical gear. I keep my phone in an inner jacket pocket close to my body, not in an outer cargo pocket or backpack where it’s exposed to the cold. I also carry a small 5,000–10,000 mAh power bank in the same pocket, with a short cable ready to plug in during lift rides. On one January trip to Asahidake, my iPhone 13 mini would shut down after two or three photos if I left it exposed on the ropeway platform at -18°C. Once I started keeping it under my midlayer and only pulling it out briefly for photos or maps, the problem almost disappeared.
Cold can also affect touchscreens and camera lenses. Capacitive screens are less responsive when your fingers are frozen, so consider thin liner gloves that still work with touchscreens. If you’re using your phone for navigation to an onsen or restaurant after riding, the last thing you want is to stand outside a Sapporo subway exit trying to unlock your phone with numb fingers. Condensation is another issue: when you bring a cold phone into a warm, humid onsen changing room, moisture can build up on lenses and occasionally inside ports. I usually give my phone a few minutes to acclimate in a pocket before pulling it out in steamy environments.
Network-wise, Japanese carriers are well adapted to winter conditions, and I’ve rarely seen mobile data in Japan for tourists suffer just because of temperature. The bigger issue is coverage in deep valleys or remote backcountry zones. Even on major networks, you can expect patchy or no signal in some off-piste areas around Asahidake or in less-developed backcountry zones. This is where having offline maps downloaded in advance is crucial. I always save offline areas in Google Maps for Sapporo, Niseko, Furano, and any backcountry trailheads I plan to use. That way, even if my eSIM is active but there’s no signal, I can still see where I am relative to the nearest road, bus stop, or town.
Micro Tips for Powder Chasers: Transport, Timing, and Tech
Once your basic route and connectivity are sorted, the details start to matter. Powder chasers live and die by timing—being on the right lift when it opens, hitting the right gate when patrol gives the green light, or catching the first bus to a less crowded resort on a storm day. One counterintuitive tip: don’t rely solely on resort websites. In Hokkaido, a lot of real-time intel spreads through social channels, local guide services, and even Japanese-language Twitter accounts. With a solid data connection through the best eSIM for Hokkaido powder snow trips, you can monitor multiple sources at once, using translation tools when needed.
Transport is another area where connectivity pays off. JR Hokkaido trains are generally reliable, but winter storms can cause delays or cancellations, especially on lines heading to Asahikawa or Otaru. Buses to ski resorts sometimes adjust schedules or routes when roads are icy. I’ve had days where a quick check of a bus company’s website (with auto-translate) saved me from waiting 40 minutes at the wrong stop in -12°C. Having your e-ticket emails, QR codes, and booking confirmations easily accessible on your phone also speeds things up when you’re boarding a crowded resort shuttle at New Chitose.
On the mountain, think about how you’ll use your phone without constantly exposing it to the cold. Many riders now use their phones to track runs on apps like Strava or Ski Tracks, or to coordinate meetups through messaging apps. I recommend setting up a dedicated group chat for your travel party before you arrive, agreeing on a few basic protocols: for example, “drop a pin at lunch spots,” “send a quick message when you’re taking last run,” or “share your live location if you split up in bad visibility.” These small habits make a huge difference when you’re navigating tree runs and storm days, especially if you’re mixing different ability levels in one group.
Finally, don’t forget about payments. Japan is more card-friendly than it used to be, but you’ll still find cash-only mountain restaurants and small guesthouses. At the same time, IC cards like Suica or PASMO (now often used via Apple Pay or Google Wallet) are incredibly useful for trains, subways, and even some vending machines. With a stable data connection, you can top up digital cards, check balances, and quickly translate payment instructions. It’s similar to how I manage transit in other countries—on a recent trip using a Turkey eSIM for Istanbul and Cappadocia, having data meant I could reload my Istanbulkart on the fly and never worry about ticket machines—Hokkaido works the same way once you’re set up.
Staying Safe, Sane, and Connected: Practical Winter Travel Tech Tips
Beyond the mountain and festival, winter in Hokkaido throws a few everyday challenges at you that are easier to handle when your tech is dialed in. Sidewalks in Sapporo and Asahikawa can be sheets of compacted snow and ice, and I’ve seen more than a few travelers slip while walking and watching their phone at the same time. One simple rule I follow: if I need to check maps or messages while walking, I step into a doorway or side street for a moment rather than trying to multitask on icy pavement. It sounds basic, but it’s the kind of micro habit that prevents injuries and broken phones.
For navigation, combine online and offline tools. Before you leave your hotel Wi‑Fi in the morning, pin key spots: your accommodation, the nearest convenience store, the bus stop for your resort shuttle, and any onsen or dinner spots you’ve picked out. Even if your connection drops for a moment, those pins give you an easy visual reference. I also like to save Japanese names alongside English ones in my notes app—showing a driver “テイネスキー場” (Teine Ski Resort) in Japanese can be more effective than trying to pronounce it after a long day riding.
Another underrated winter travel tech tip is to manage your notifications. Hokkaido’s quiet, snowy atmosphere is part of its charm, and constant pings from group chats back home can be distracting. I usually set my phone to focus mode during riding hours, only allowing notifications from my travel group, resort apps, and essential services. This keeps my attention on conditions and safety without fully disconnecting. It’s the same approach I recommend for any winter trip, whether you’re chasing desert sun with a Morocco in winter itinerary or hopping between Caribbean islands.
Lastly, keep backups of critical information in case something goes wrong. Take screenshots of your eSIM QR code or installation email before you travel, and store them in a secure notes app that works offline. Do the same for hotel addresses, booking numbers, and any important phone numbers (like your insurance provider or tour operator). If your email app struggles to load in a low-signal area, those screenshots can be a lifesaver. It’s a small step that can prevent a lot of stress if your phone glitches or an app refuses to cooperate when you’re standing in a snowy parking lot trying to find your ride.
Putting It All Together: Designing Your Ideal Hokkaido Powder & Festival Trip
By now, you’ve probably realized that a great Hokkaido powder snow trip is less about hitting every famous name on the map and more about smart combinations. A realistic hokkaido powder snow route with Sapporo Snow Festival might look like this: fly into New Chitose, activate your eSIM as soon as the plane lands, spend two nights in Sapporo exploring Odori Park and Susukino, then move to your chosen base—Niseko, Asahikawa, Furano, or Sapporo itself—for five or six days of riding. Along the way, you use your phone strategically: checking storm forecasts, adjusting plans when trains are delayed, and coordinating festival meetups without getting separated in the crowds.
There’s no single “right” way to combine the Sapporo Snow Festival with snowboarding in Hokkaido, but there are definitely wrong ways—like overloading your schedule with three different regions in seven days, or relying entirely on hotel Wi‑Fi and hoping public networks will fill the gaps. In my experience, travelers who invest a little time up front into choosing the best eSIM for Japan travelers, downloading offline maps, and understanding how cold affects their devices end up with trips that feel smoother and more relaxed. They spend their energy hunting lines through birch trees and savoring festival food stalls, not hunting for SIM cards or panicking over dead batteries.
If you’re the kind of person who geeks out on planning, you can even take it a step further: map out backup days in your itinerary for storm cycles, identify a “storm day” resort with good tree cover, and bookmark local weather and avalanche sites in your browser. None of this has to be complicated, but it does benefit from having always-on data. Just as you might research connectivity before a European city break with a United Kingdom eSIM for London and the Highlands, doing the same for Hokkaido gives you more control over your time and budget.
When you’re finally standing in knee-deep powder at Niseko or watching projection-mapped snow sculptures light up Odori Park, you’ll be glad you took the time to think through both the fun parts and the unglamorous details like eSIM setup and battery management. That’s really the heart of smart winter travel: respecting the environment you’re in, using technology as a tool rather than a distraction, and leaving enough flexibility to chase those magic days when everything lines up—fresh snow, clear visibility, and a hot bowl of miso ramen waiting for you back in town.
Hokkaido rewards travelers who prepare just enough, then let the weather lead the way. Get your route sketched out, sort your connectivity with a reliable Japan-focused eSIM, and give yourself permission to adjust plans when the snow gods deliver. Do that, and you’ll walk away with exactly the kind of stories powder chasers live for—and a camera roll full of festival lights and face-shot selfies to prove it.